Tuesday, October 26, 2010

Bistro BLTs with Homemade Mayonnaise

The Sandwich: what could be more wonderful? The simple splendor of stuff between bread is matched only by the sheer versatility of this artistic medium. Hot or cold, soft or toasted, big or small, the sandwich can be one of the most fabulous lunches you’ve ever had.

However, it can also be one of the biggest letdowns. Too many times have we gone to a restaurant and ordered a BLT (bacon makes everything awesome), just to be disappointed by stale bread, iceberg lettuce and overdone, re-microwaved bacon. With something as straightforward as a BLT, attention needs to be paid to the little details. That extra bit of care can take something as ordinary as a BLT into something to savor.

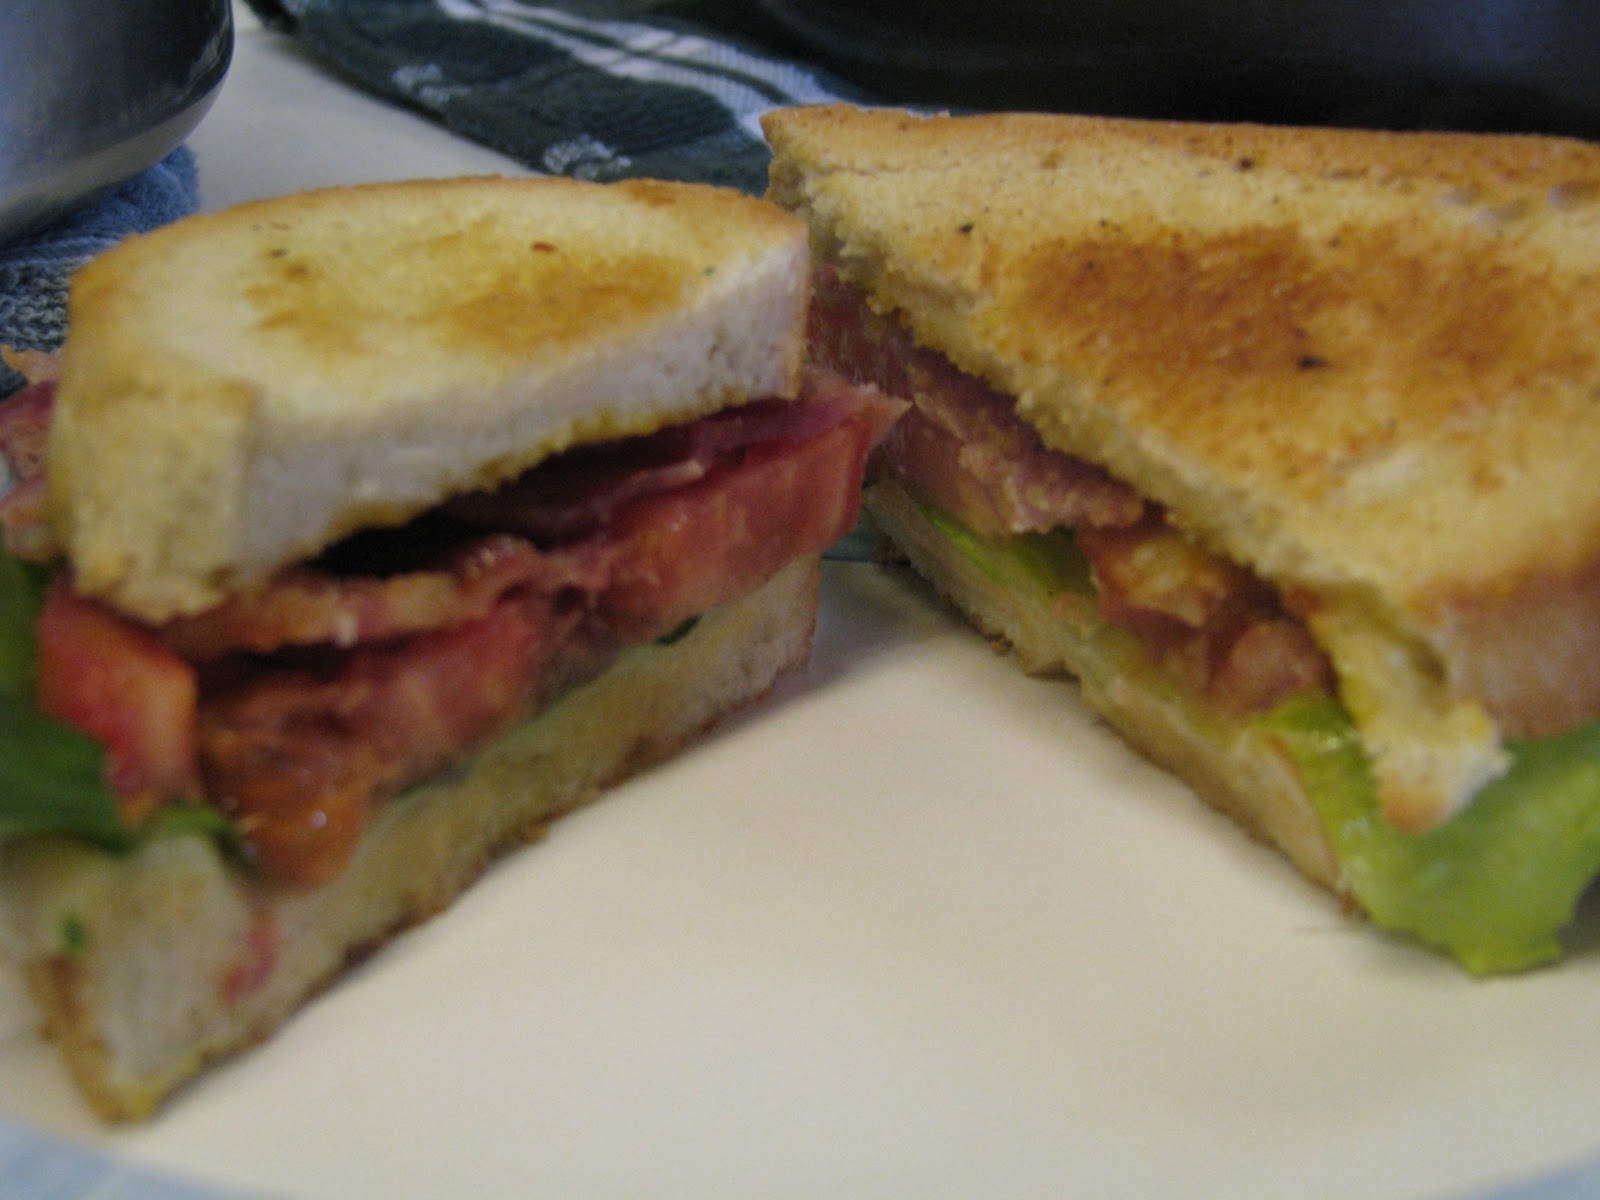
That’s what we tried to do for our young adult group the last time we cooked lunch. We wanted something more savory to go with our sweet and spicy Roasted Butternut Squash Soup while being light enough not to weigh everyone down for the rest of the day. What really set this “Bistro BLT” apart is the homemade mayonnaise. It’s easier than you’d think to make, WAY better than what you buy at the store and you can add all sorts of flavors to make it your own.

First, a word of caution: the homemade mayonnaise is made from uncooked egg yolks. They provide the body for the sauce and bind the whole thing together. The vinegar in the recipe should eliminate most “microbial beasties,” but if you’re sensitive about that sort of thing just use your favorite store-bought mayonnaise and dress it up however you like.


Ingredients:


Loaf of crusty bread (we used sourdough), sliced in about ½ inch slices.

Thick-cut bacon, about 4 slices per sandwich

Tomatoes – beefsteak, heirloom, or your favorite – sliced about 1/8 inch thick

Romaine lettuce, rinsed and patted dry.
(I urge you to use a lettuce with more flavor than iceberg, whatever that might be. Your sandwich will thank you.)

Mayonnaise – homemade (recipe follows), or store-bought, with your preferred flavor additions. We added the following: curry powder, garlic powder, chili powder and cayenne pepper.

Provolone cheese (optional, but recommended)

Salt and pepper

Olive oil


Remember, the key to a great BLT is attention to detail, so make sure you take care of your ingredients in every step.

Step One: Prep the ingredients.

Slice the bread and tomatoes; peel off the bitter outer leaves from the romaine to get to the sweeter inner leaves, rinse and pat dry. Lay the tomato slices out and lightly season with salt and pepper on both sides. You don’t need too much since the bacon is salty, but seasoning every layer helps make your whole sandwich more delicious.


Step Two: Cook the bacon.

Using your preferred method, cook the bacon. Jackie likes to cook bacon in the microwave inside folded paper towels. True, it’s fool-proof and clean up is a snap, but I prefer putting the slices on a baking sheet and putting it in a 350˚ oven until just done. This way you can cook as much bacon as you need all at once. It’s a good idea to flip the bacon around half-way through in the oven method, though, to make sure nothing sticks.

When the bacon is done, remove to paper towels to drain off excess grease.


Step Three: Toast the bread.

Lightly brush the bread on both sides with olive oil and season with salt and pepper. Place on baking sheets and place in the oven, turning once until both sides are slightly golden. Once the bread is done, place one slice of provolone per sandwich on the slices of bread and melt slightly.


Step Four: Assemble!

While the bread is still warm, spread a light coating of mayonnaise on both slices. Place the bacon on top of that, followed by the lettuce and two tomato slices, as if you needed to be told how to assemble a sandwich :) Enjoy!


Homemade Mayonnaise:

Ingredients:
5 egg yolks
12 oz of olive oil
1 tsp of mustard powder
1 tsp or so of vinegar
1 tsp or so of lemon juice
Salt and pepper to taste

Directions:

Whip the egg yolks and mustard powder together until thick and frothy.

Gradually add in oil to the eggs at a slow rate while whisking. Whisk to desired thickness.

Add vinegar and whisk (optional).

Add salt and pepper to taste.

At this point, you can add any extra flavorings you desire. We added: ¼ tsp of curry powder, ½ cayenne pepper and ¼ of garlic powder.


P.S. We saved the heels of bread for the sandwiches, drizzled them with a little olive oil, sprinkled them with salt, pepper and dried thyme, spread them out on a baking sheet and toasted them as croutons for our Roasted Butternut Squash Soup. Waste not, want not!

Monday, September 27, 2010

Roasted Butternut Squash Soup

It’s official; summer is over. Gone are the days of flip flops and Bermuda shorts, here to stay are hoodies and long underwear. It was our turn to cook lunch for the young adult group at church last Sunday, and we wanted to make something that reflected the change in season and warmed us from the inside out. Right about now the gardens go from offering all those tart, bright tomatoes to the heartier vegetables like squash, so that’s what we went with.

We made a creamy and spicy roasted butternut squash soup without using cream or milk. The key is making something called a velouté, which is basically a roux that’s thinned a little with stock to remove that raw flour taste and give your soup the thickness it needs. For those steering clear of dairy but love creamy soups this is a great technique to learn.

This recipe also calls for Five Spice, sometimes marked as Chinese Five Spice in stores. This little jar changed our lives (not really, but it’s still pretty cool). It’s a mixture of cinnamon, clove and other spices, which vary from maker to maker, but they all provide a sweet and spicy powder that’s great in everything from tempura batter to pumpkin pie. If you don’t have it, you should get it. If you don’t want to get it, I guess you could leave it out, but you don’t know what you’re missing.

As a finish touch, we recommend a dollop of sour cream, some chopped sage and a few homemade thyme croutons. We served our soup with bistro BLTs and used the heels of the bread to make these crunchy salty bites, and the recipes for both will be on another post.


Roasted Butternut Squash Soup


Step One: Roast the squash:

About 3 pounds butternut squash (preferably 1 large squash)
Salt
Freshly ground black pepper
Olive oil 
¼ cup of water
2 tbl finely chopped fresh sage leaves
2 tbl granulated sugar
¼ cup balsamic vinegar
2 tsp of five spice (optional)

Peel, seed, and cube the squash and place in a bowl and cover with olive oil. In a saucepan, stir together water and sugar and boil to make simple syrup. Stir in the balsamic vinegar, sage leaves, salt and pepper and the five spice, if using. Pour over the squash. Place the squash on a baking sheet and roast for 45 minutes at 400 degrees until tender. Blend in a processor until smooth.

Step Two: Make velouté.

½ stick of butter
1/3 cup of flour
½ cup of chicken stock

In a pan melt your butter and add flour over medium heat to make a roux. After the roux has been mixed well add the stock. After the stock is well-incorporated set aside.

Step three: Make the rest of the soup already.

2 tablespoons extra-virgin olive oil
½ cup onion, diced
½ cup celery, diced
½ cup carrot, diced
1 cinnamon stick
Sea salt
Freshly ground black pepper
½ teaspoon of cayenne pepper


In a pot, sauté your onion, celery and carrot in olive oil. Salt and pepper to taste. Add the volute to the vegetable mixture and gradually add the rest of your stock. Add your butternut squash and mix until smooth. At this point you can add a cinnamon stick, extra salt, or cayenne pepper to taste. Cayenne pepper adds an extra kick and works well with the sweetness of the soup.

Let the soup simmer for about 1 hour. Before you serve or store, fish out the cinnamon stick. If you refrigerate make sure to add more stock or water when you reheat or it will be too thick. Serve in bowls, obviously, with a dollop of sour cream, chopped sage and croutons, if desired.

Monday, September 13, 2010

Pasta with Cherry Tomatoes, Fresh Herbs and Parmesan

Have you ever had one of those Saturdays where you had plenty to do, but decided early on nothing was gonna get done? That was me last Saturday. After a busy week, I didn’t want to spend a fortune at a restaurant or the grocery store for dinner. I needed something I could make with what I already had on hand but would still be delicious. Now, you don’t need one more person telling how important a well-stocked pantry is. However, a well-stocked pantry along with a garden with some of my favorite veggies and herbs saved me from shelling out major dollars and, for that matter, changing out of my jammies.

This dish has the classic pairing of fresh tomatoes, basil, olive oil and cheese, but the residual heat from the pasta gives the tomatoes’ acidity an extra punch when you bite into them. Make sure they’re balanced well with the richness of butter and oil, and, of course, the more cheese the better.


Pasta with Cherry Tomatoes, Fresh Herbs and Parmesan


½ lb. pasta of choice (I used whole wheat linguine)
15-20 cherry tomatoes
1 bunch of basil
2 sprigs oregano
1 ½ cups grated parmesan cheese
Olive oil
2 tbl. butter
Salt and pepper


Boil pasta in salted water according to packaged instructions. In the meantime, slice the bigger cherry tomatoes in half and leave the smaller ones whole. Sprinkle them with salt and leave them to drain in a colander. Pick the leaves of basil and oregano and chop.

When the pasta is al dente, reserve some of the pasta water and drain. Transfer the pasta back to the pot and add the herbs, butter and a few cracks of black pepper.  Stir gently so as not to break up the pasta. Add some reserved pasta water to keep the pasta moist, but only a little at a time so it doesn't get water-logged. Add the cheese and stir until melted.

Transfer to plates and drizzle with olive oil. Top with more cheese and a few whole leaves of basil and serve.

Monday, September 6, 2010

Fresh Tomato Salad


We like to call this an "ode to Oliver". Jamie Oliver is a huge influence on our cooking style. Ryan starting watching his show "Jamie at Home" a few years ago. What he likes about this show is that it focuses on fresh, local ingredients. The idea is using everything that is indigenous to your area and refueling the local agricultural and food markets rather than ordering away for outsourced and often times over-preserved foods.

If you have taken on the challenge of growing a garden this year or at least have helped in maintaining one this recipe is for you. At the end of summer tomatoes are often (if it is a good year) everywhere and it is difficult to find things to do with them. There is the option of canning (which is a whole other subject) or making spaghetti....again. Fresh Tomato Salad is an easy, no nonsense way to impress your friends and watch your waste line. All you need is a few ingredients and a good glass of your favorite wine. A good paring would be Cabernet Savingnon (if you like red) and a Pinot Grigio (if you like white). Add your favorite cheese and eat up!


Fresh Tomato Salad


Ingredients:
10-12 assorted tomatoes, big and small (The greater variety of types, colors and sizes the more interesting and flavorful your salad will be)

2 tsp. coarse salt

1/2 clove garlic, grated

Red wine vinegar

Extra virgin olive oil

3 oz. mozzarella cheese (or feta)

1 chile (salsa, fresno, or your favorite), seeded and diced

5-6 basil leaves

2 sprigs thyme and oregano

Fresh cracked pepper


Preparation:


Take the stems out of the bigger tomatoes and slice them however you like. I like to slice some, dice others and cut the rest into wedges. For smaller tomatoes, such as cherries, just cut them in half. Place all the tomato pieces into a colander and sprinkle with salt. Mix together and leave to sit in the sink for 10-15 minutes to let some of the excess moisture drain out of the tomatoes.

Put your drained tomatoes in a big bowl and add your grated garlic, diced chile pepper and a couple grinds of black pepper. Drizzle in enough extra virgin olive oil to coat the tomatoes and a few dashes of red wine vinegar and gently mix everything together. The ratio of olive oil to vinegar should be about like a salad dressing - 3:1.

Plating:

To serve, place the bigger slices around the bottom of the plate, top with the remaining tomatoes and drizzle some of the dressing over them. Tear up some mozzarella or feta cheese and sprinkle on the salad. Rip up the basil leaves and let them fall over the salad. Take the thyme and oregano of their stems and do the same.

Serve in the middle of the table on its own or with some toasted bread. Goes will with roasted fish or pork.

Sunday, August 29, 2010

Marscapone Cheese Tart with Fresh Berries and Strawberry Sauce

Ahhh summer! How I will miss thee! Swimming, carnivals, and BBQ! This past season my husband Ryan and I tried out some new recipes and also made a few of our own. Sometimes we have a habit of cooking a bit on the heavy side. We tend to lean to lots of protein, carbs, and butter. Oh, butter! How I love thee! But that is for another day.


With our little “heavy cooking” problem we made it a goal to come up with a dessert that was a bit lighter in flavor and went well with the summer season. What was the solution? Mascarpone Cheese Tart with fresh berries and a strawberry sauce. What is Mascarpone you ask?? Well, let me introduce you to this very pleasant creamy cheese! Mascarpone is basically the Italian version of cream cheese. The difference between to two is the Mascarpone is slightly lighter in flavor and holds its shape when added to dish better than regular old cream cheese.

For a summer pool party or dinner party it is a nice ending to a fabulous meal and would go well at the end of a steak dinner or even after a classic BBQ feast. If you are a “wino” such as myself you could also pair it with a nice sweet Mascato D' Asti or a dark Port wine.

We hope this inspires your culinary adventures for the upcoming Labor Day holiday and hopefully your summer was wonderful and your fall will be even better!


Mascarpone Cheese Tart with Berries and Strawberry Sauce


Ingredients:


Filling:


8 oz. Mascarpone Cheese

4 oz. Cream Cheese

1 oz. Lemon and lime zest

Juice of 1 lemon and Lime

¼ cup powdered sugar

Pinch of salt

Seasonal Berries (example: raspberries and blueberries)


Crust:


½ cup of vanilla wafer crumbs

¼ cup of chopped pecans

2 tablespoons melted butter

Pinch of salt


Sauce:


¼ cup of brown sugar

½ cup water

2 cups strawberries

2-3 leaves of fresh mint

1 tablespoon of balsamic vinegar

1 tablespoon of butter

1 tablespoon of flour

Pinch of salt


Preparation:


Crust: Turn on the oven to 400 degrees. Place the wafers and pecans in a food processor and process to a fine crumb. Add salt and melted butter until the crumb moistens. In a tart pan press the wafer mixture covering the bottom 1/8 inch thick. Bake in oven for 5-10 minutes.


Filling: In a mixing bowl combine the mascarpone cheese and the regular cream cheese. After that is mixed well add the zest and juice. After that is completely mixed add the powdered sugar and salt to taste. Once the crust has cooled, smooth the filling over the crust, then add your fruit topping. Chill for a few minutes to set or make the night before for best results.


Sauce: In a sauce pan dissolve your brown sugar in your water to make a simple syrup over medium to high heat. Once this has happened add your strawberries. Cook the strawberries until they have broken down to a pulp. Put the mixture through a sieve and strain out the pulp. Bring the juice back to the sauce pan and steep you mint leaves in the juice over medium heat. Add the balsamic vinegar and salt to taste. Add the butter and flower to thicken mixture. Fish out the mint leaves and let the mixture reduce, 10 minutes, until the sauce coats the back of your spoon. Once this has happened chill then serve over your cheese tart.


Serves 6-8

Preparation time: 30-40 minutes